作者:楊德倫 / 資策會數位教育研究所數位人才培育中心講師
使用電腦的過程中,與桌面應用程式互動,例如針對特定位置連點兩下開啟檔案,或是對特定圖示進行點按,已經是平常不過的事,倘若這些操作流程需要重複操作,可能會造成使用者的困擾、增加工作量,甚至是大幅降低對工作或生活的熱忱,有鑑於此,我們需要一個自動化的機制,協助我們完成重複的工作,讓人們專注在更重要的事情上。
本文中,我們將使用PyAutoGUI,讓程式進行基本的圖片辨識,取得圖片在電腦螢幕上的座標,進行互動,亦可透過取得座標的 RGB 值,來判斷何時應該對畫面進行點擊與互動,達到自動化的目標。
前言
PyAutoGUI是一個跨平台(cross-platform)的圖形化使用者介面(Graphical User Interface,GUI)自動化 Python 套件與模組,協助使用者透過程式控制電腦的滑鼠(Mouse)和鍵盤(Keyboard),除此之外,還能在桌面環境輸出訊息框(Message Box)以及螢幕截圖(Screenshot)。
本文使用的測試環境為Windows10教育版、Python 3.8以上版本,同時提供兩個案例說明:開啟小算盤(計算機),自動讀取按鈕截圖,判斷按鈕是否在螢幕畫面當中,同時取得該按鈕的座標,進行點擊;開啟網頁休閒遊戲的頁面,決定合適的點擊座標,取得RGB值,藉以判斷何時應該點擊,以及設定點擊的間隔時間。
前置作業
進行自動化程式撰寫前,需要先安裝案例中所用到的套件;讀者若有習慣的安裝方式,可以自行客製化。
|
套件安裝指令
|
|
pip install pyautogui opencv-python opencv-contrib-python keyboard
|
參考函式列表
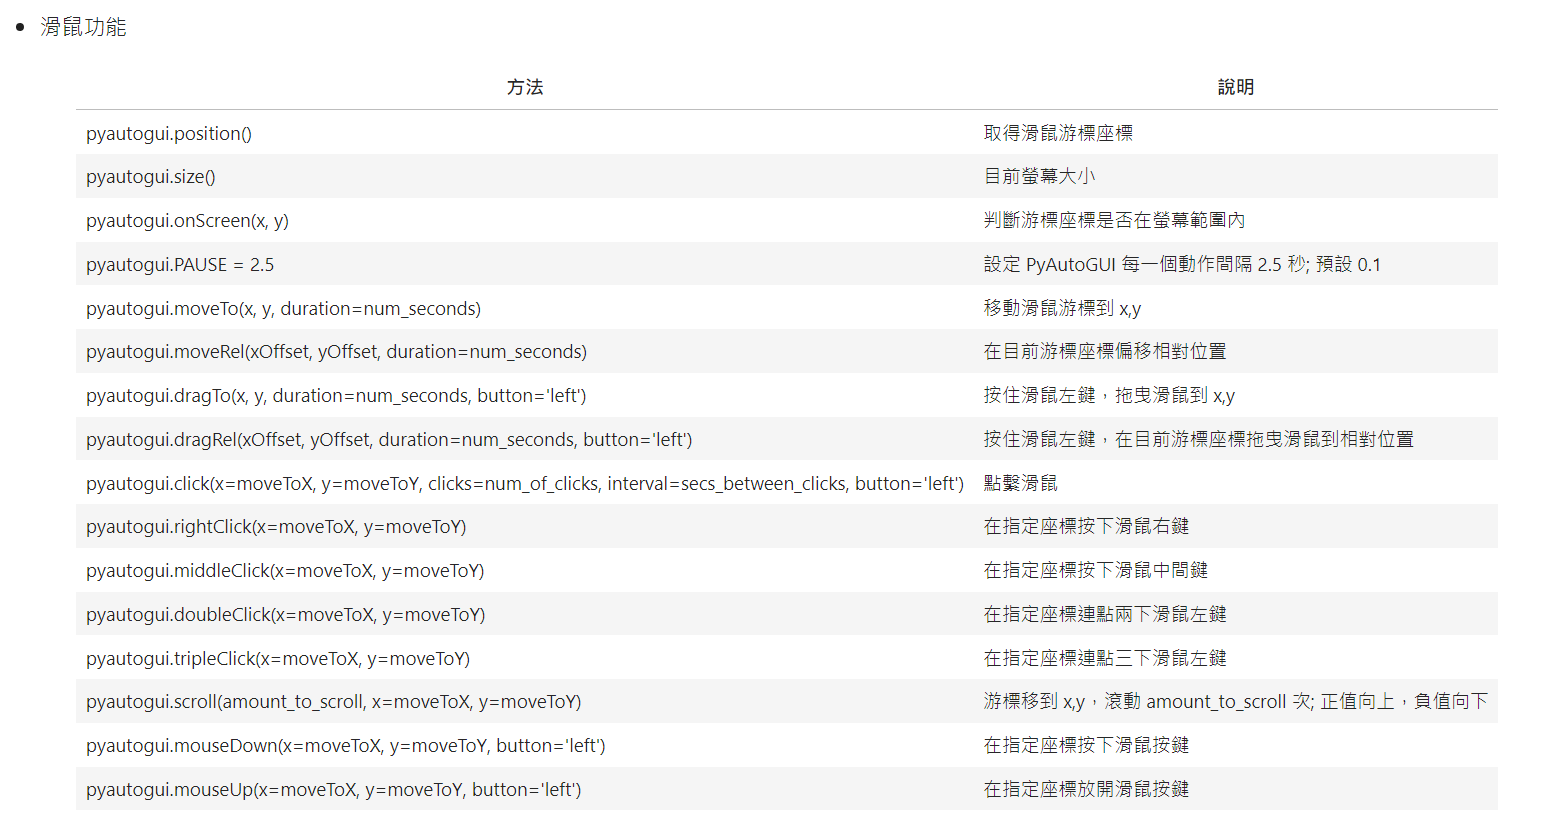
圖1 滑鼠功能

圖2 鍵盤功能
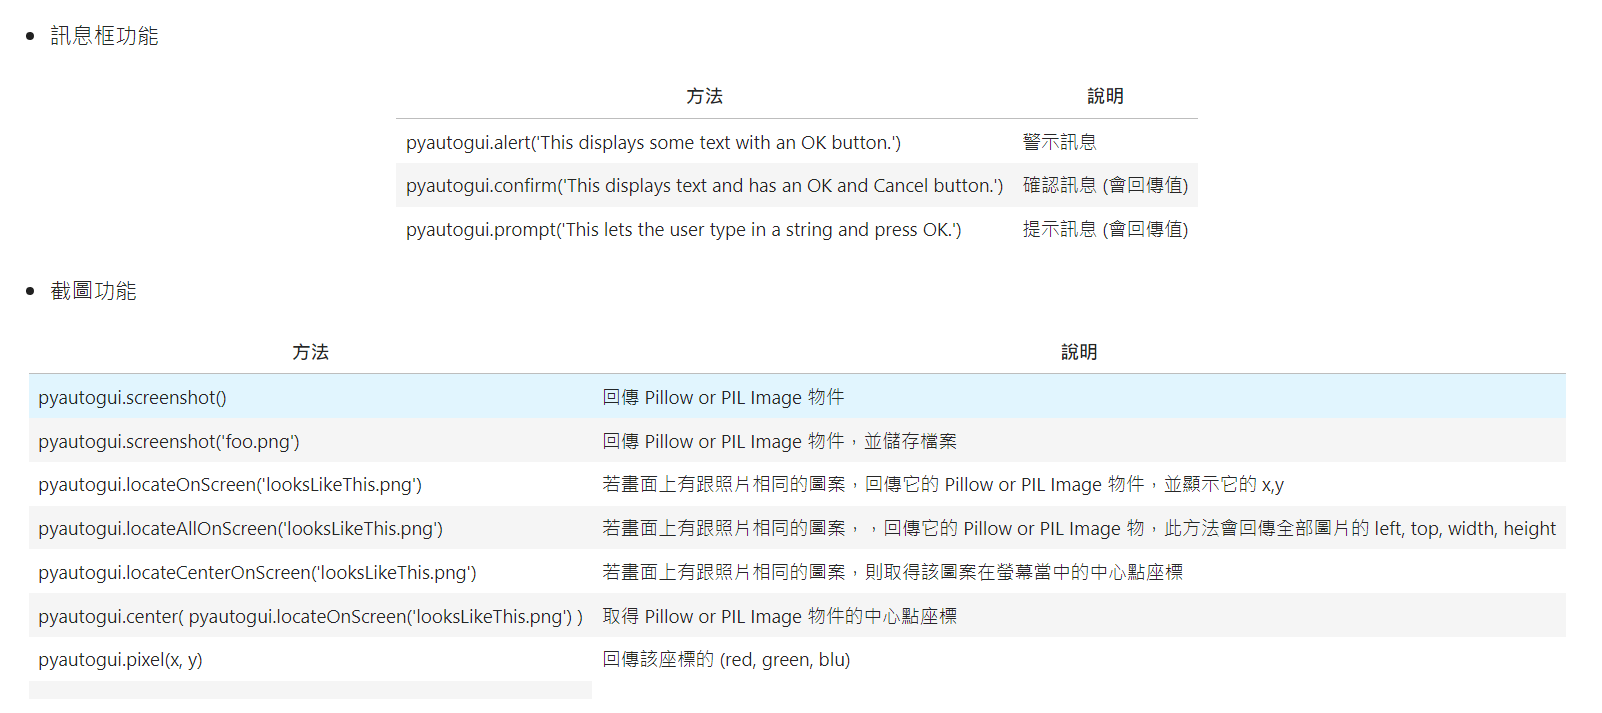
圖3 訊息框與截圖功能
如果需要透過 PyAutoGUI來按下鍵盤,以下提供按鍵名稱(key_name)參考:
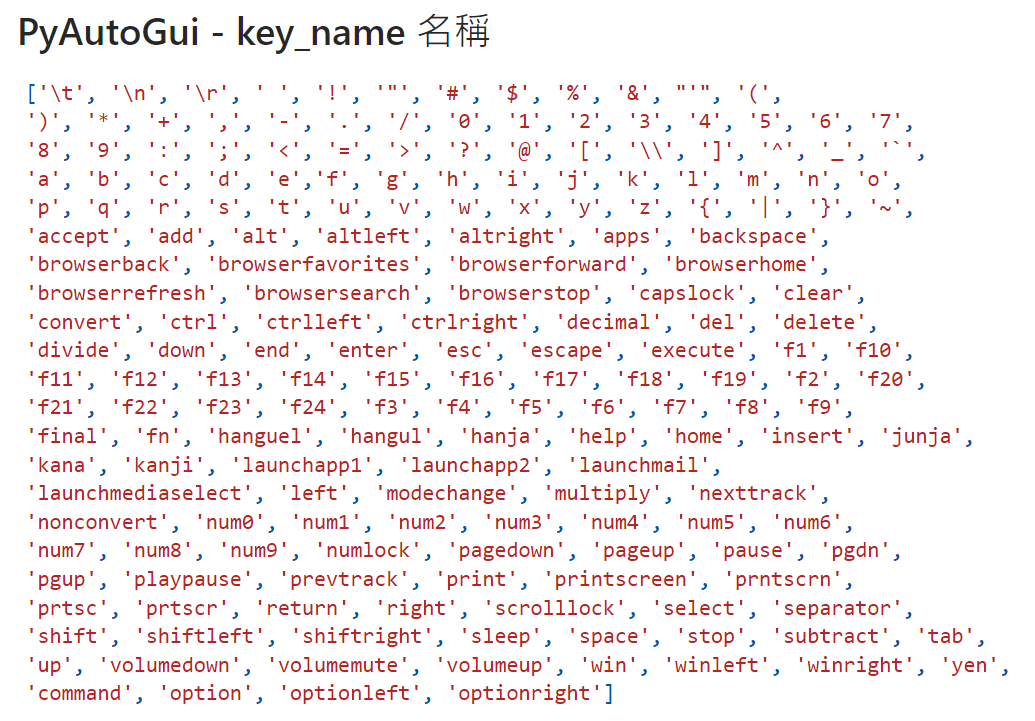
圖4 PyAutoGUI的key_name列表
匯入模組
|
使用套件與模組
|
|
import pyautogui, cv2
from time import sleep, time
import keyboard
from IPython.display import clear_output
|
自動使用小算盤(計算機)
我們需要對部分按鈕進行截圖,幫助程式辨識該按鈕的中心點座標:
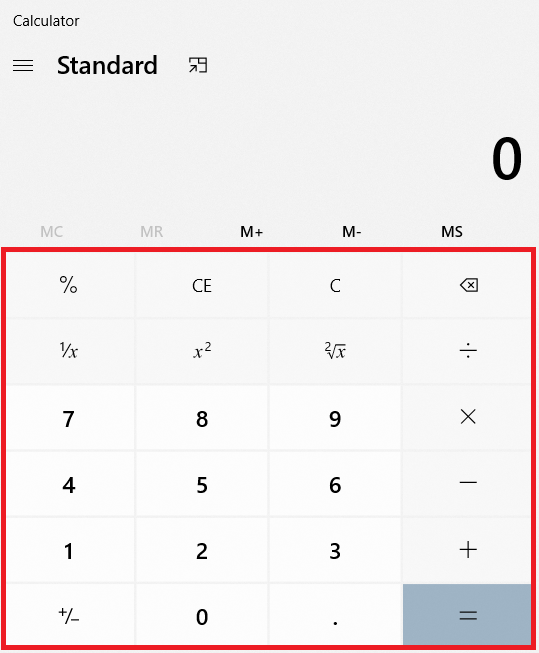
圖5 依需求取得按鈕的截圖

圖6 本案例所選擇的按鈕圖片,存放在專案的images資料夾當中
|
程式碼
|
| '''自動使用計算機補充: 此時計算機應該明顯出現在桌面上,不然會有判斷錯誤的問題 設定 confidence 是為了解決圖像誤差的問題(可參考 OpenCV 關於 confidence 的說明)。由於每個人電腦的解析度與色彩設定不盡相同,若是將按鈕截圖與他人分享,可能會造成辨識上的誤差,此時可以修改該值,來完成比對;如果還是無法正常比對,建議自行截圖,此時圖片最接近本機的設定。''' # 設定每一個動作,都暫停若干秒pyautogui.PAUSE = 0.1 # 比對所有圖片,取得顯示在桌面的圖片物件btn_0_location = pyautogui.locateOnScreen('images/0.png', confidence=0.9)btn_1_location = pyautogui.locateOnScreen('images/1.png', confidence=0.9)btn_2_location = pyautogui.locateOnScreen('images/2.png', confidence=0.9)btn_3_location = pyautogui.locateOnScreen('images/3.png', confidence=0.9)btn_5_location = pyautogui.locateOnScreen('images/5.png', confidence=0.9)btn_6_location = pyautogui.locateOnScreen('images/6.png', confidence=0.9)btn_7_location = pyautogui.locateOnScreen('images/7.png', confidence=0.9)btn_8_location = pyautogui.locateOnScreen('images/8.png', confidence=0.9)btn_plus_location = pyautogui.locateOnScreen('images/plus.png', confidence=0.9)btn_multiply_location = pyautogui.locateOnScreen('images/multiply.png', confidence=0.9)btn_subtract_location = pyautogui.locateOnScreen('images/subtract.png', confidence=0.9)btn_equal_location = pyautogui.locateOnScreen('images/equal.png', confidence=0.9)btn_dot_location = pyautogui.locateOnScreen('images/dot.png', confidence=0.9) # 取得每一個圖片的座標資訊btn_0_point = pyautogui.center(btn_0_location)btn_1_point = pyautogui.center(btn_1_location)btn_2_point = pyautogui.center(btn_2_location)btn_3_point = pyautogui.center(btn_3_location)btn_5_point = pyautogui.center(btn_5_location)btn_6_point = pyautogui.center(btn_6_location)btn_7_point = pyautogui.center(btn_7_location)btn_8_point = pyautogui.center(btn_8_location) # 取得每一個圖片的中心點btn_plus_point = pyautogui.center(btn_plus_location)btn_subtract_point = pyautogui.center(btn_subtract_location)btn_multiply_point = pyautogui.center(btn_multiply_location)btn_equal_point = pyautogui.center(btn_equal_location)btn_dot_point = pyautogui.center(btn_dot_location) # 按下 250pyautogui.click(btn_2_point.x, btn_2_point.y)pyautogui.click(btn_5_point.x, btn_5_point.y)pyautogui.click(btn_0_point.x, btn_0_point.y) # 按下 xpyautogui.click(btn_multiply_point.x, btn_multiply_point.y) # 按下 2pyautogui.click(btn_2_point.x, btn_2_point.y) # 按下 +pyautogui.click(btn_plus_point.x, btn_plus_point.y) # 按下 38pyautogui.click(btn_3_point.x, btn_3_point.y)pyautogui.click(btn_8_point.x, btn_8_point.y) # 按下 -pyautogui.click(btn_subtract_point.x, btn_subtract_point.y) # 按下 17.8686pyautogui.click(btn_1_point.x, btn_1_point.y)pyautogui.click(btn_7_point.x, btn_7_point.y)pyautogui.click(btn_dot_point.x, btn_dot_point.y)pyautogui.click(btn_8_point.x, btn_8_point.y)pyautogui.click(btn_6_point.x, btn_6_point.y)pyautogui.click(btn_8_point.x, btn_8_point.y)pyautogui.click(btn_6_point.x, btn_6_point.y) # 按下 =pyautogui.click(btn_equal_point.x, btn_equal_point.y) |
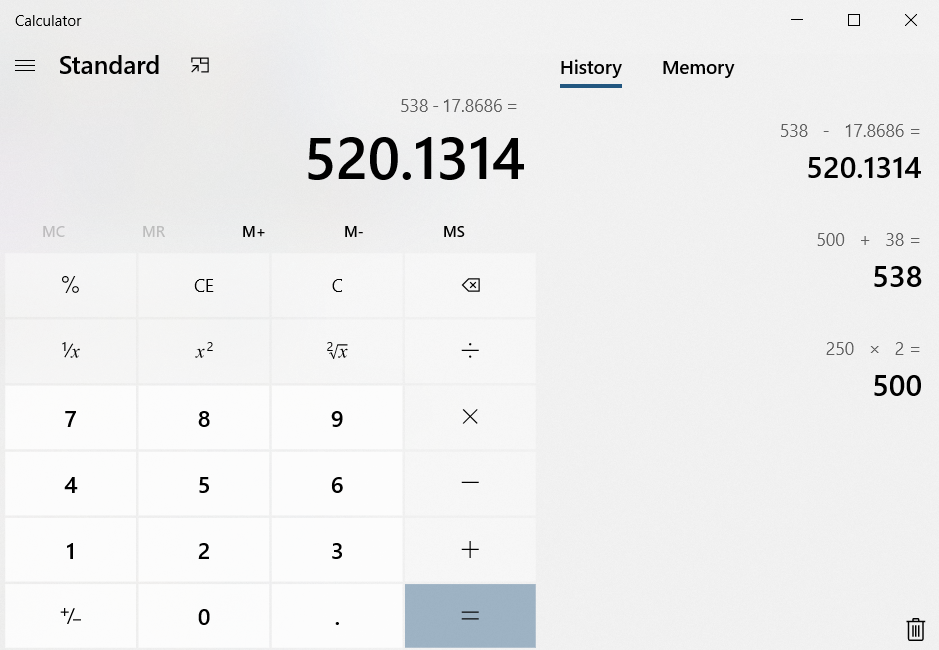
圖7 希望你的計算結果,跟我一樣
取得螢幕畫面上的座標與RGB值
建議額外開啟終端機(Terminal)視窗執行,可以方便檢視當前滑鼠游標位置的狀態:
|
程式碼
|
|
import pyautogui
'''
取得滑鼠游標的座標與色碼
補充: 建議另開 Terminal 執行
'''
pyautogui.displayMousePosition()
|
自動遊玩網頁版「太鼓達人」模擬器
網路上有一個非官方的網頁版太鼓達人模擬器,支援單人或雙人線上同步遊玩。由於個人對類似遊戲並不擅長,為了讓自己實現「一鍵遊玩」的夢想,於是撰寫了遊戲自動化的程式,供大家參考。
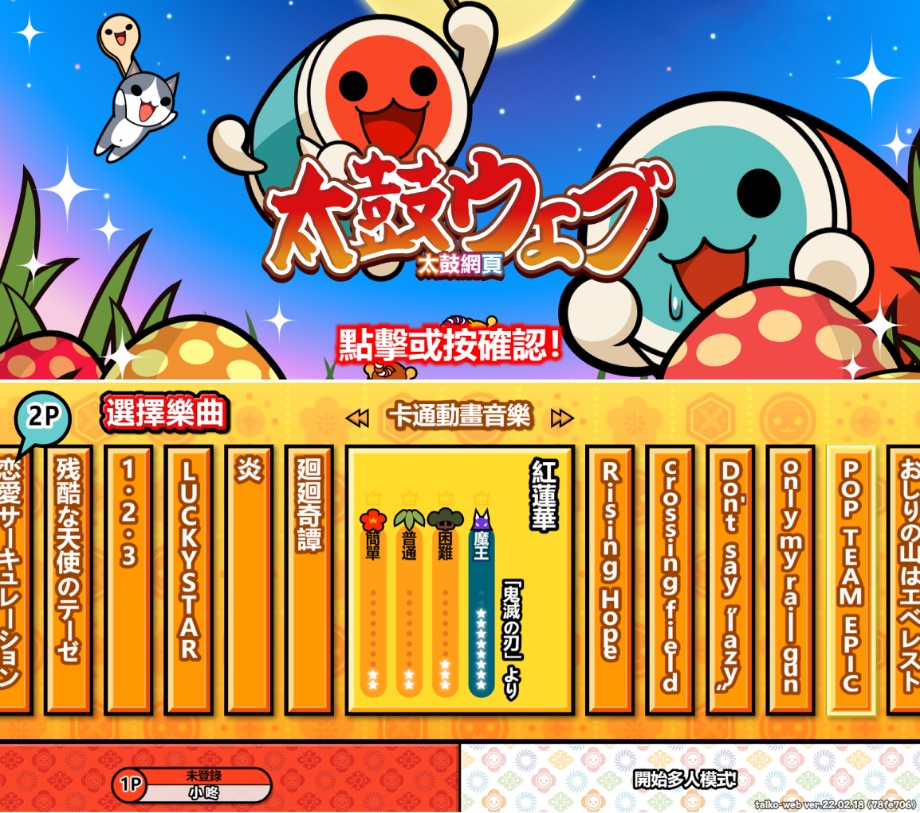
圖8 網頁版太鼓達人模擬器,支援線上對戰
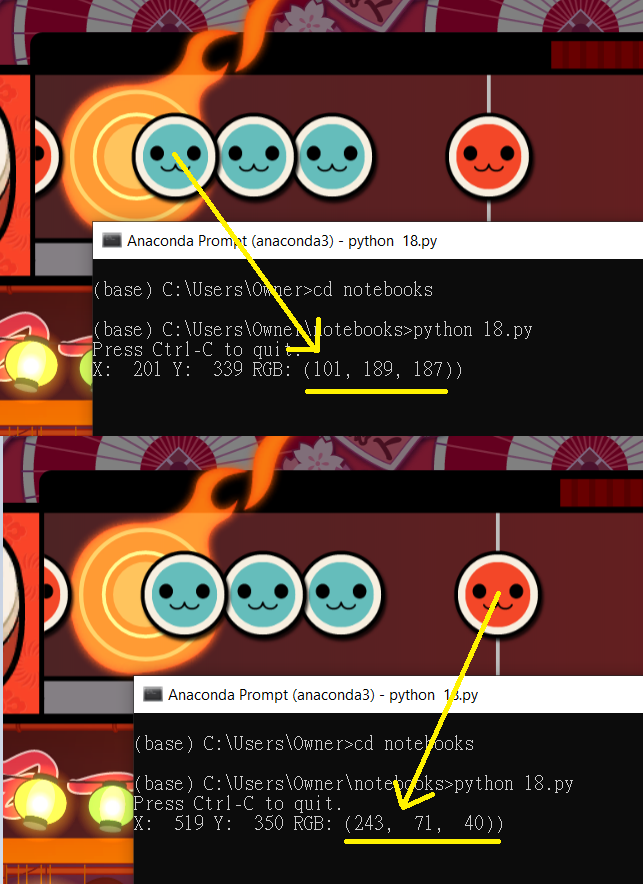
圖9 取得打擊圖示的RGB
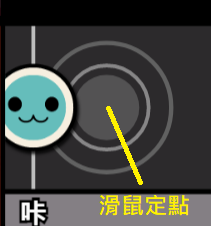
圖10 設定滑鼠定點,之後會在此處連續點擊
|
程式碼
|
|
'''
打擊遊戲
範例網址: https://taiko.bui.pm/
(請先取得參考用的座標、色碼)
Red, Green, Blue
橘色圖示: (243, 71, 40)
藍色圖示: (101, 189, 187)
連打區域: (243, 181, 0)
滑鼠定點
(x=519, y=455)
'''
# 設定每一個動作後,都暫停若干秒
pyautogui.PAUSE = 0.1
# 固定打擊點 01
listPoint01 = [519, 455]
# 點擊
def click():
# 每次點擊都會重新取得滑鼠定點的 RGB 值
coord01 = pyautogui.pixel( listPoint01[0], listPoint01[1] )
# [0] 代表 Red,[1] 代表 Green,[2] 代表 Blue
if coord01[0] == 243 and coord01[1] == 71: # 若 R = 243, G = 71
pyautogui.press('j') # 右邊內側橘色
elif coord01[0] == 101 and coord01[1] == 189: # 若 R = 101, G = 189
pyautogui.press('k') # 右邊外側藍色
elif coord01[0] == 243 and coord01[1] == 181: # 若 R = 243, G = 181
pyautogui.press('d') # 左邊外側藍色
pyautogui.press('f') # 左邊內側橘色
pyautogui.press('j') # 右邊內側橘色
pyautogui.press('k') # 右邊外側藍色
'''
主程式區域
'''
if __name__ == "__main__":
while True:
# 當我們按下 ctrl 鍵時,自動點擊
if keyboard.is_pressed('ctrl'):
click()
|
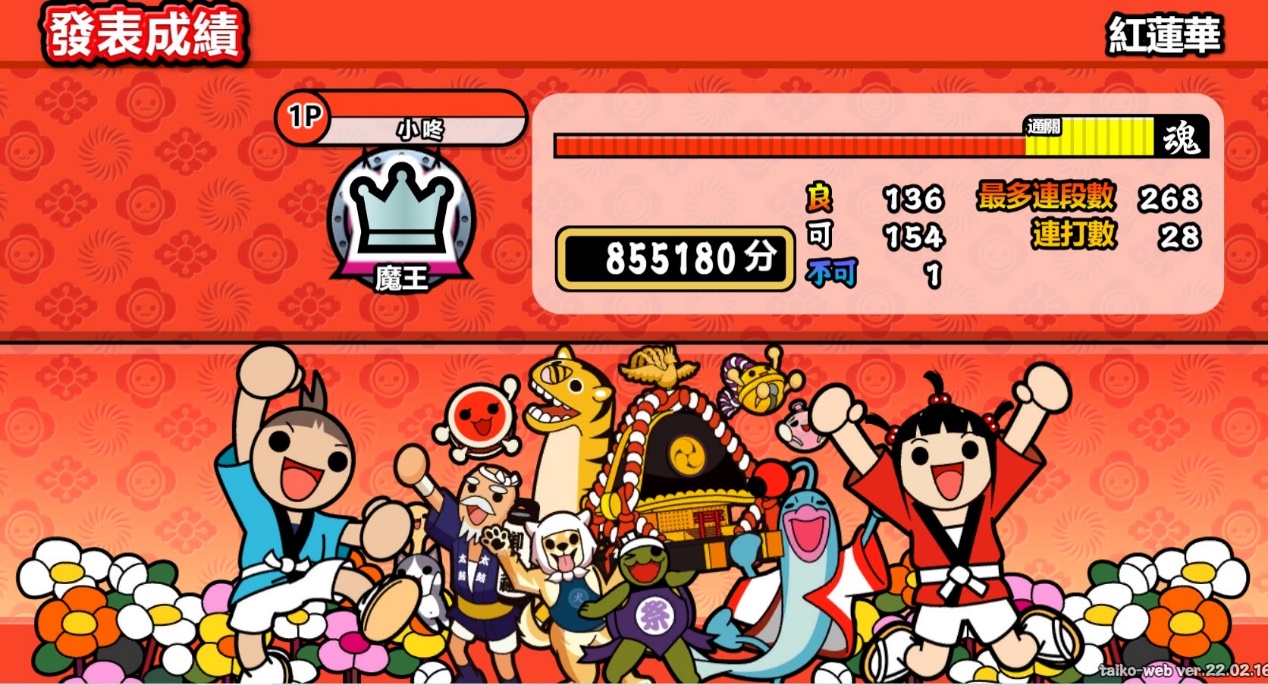
圖11 《鬼滅之刃》片頭曲「紅蓮華」透過程式自動化操作的結果
後記
本文以PyAutoGUI作為自動化模組套件,除了讀取圖片,比對螢幕畫面當中的按鈕,並取得該按鈕在螢幕畫面的中心點座標,自動點擊小算盤(計算機),以及不斷取得指定座標的RGB值,來判斷該按下哪一個按鍵,達到自動進行遊戲的目的。
自動化可以減少重複的操作,讓使用者有時間專注在重要的事物上。希望大家在實作的過程中,能夠得到新的啟發,舉一反三、觸類旁通,開發出更方便、更有趣、更有幫助的自動化程式。
參考資料
[1] Welcome to PyAutoGUI’s documentation!
https://pyautogui.readthedocs.io/en/latest/index.html
[2] PyAutoGUI : 使用Python控制電腦
https://yanwei-liu.medium.com/pyautogui-%E4%BD%BF%E7%94%A8python%E6%93%8D%E6%8E%A7%E9%9B%BB%E8%85%A6-662cc3b18b80
[3]【PYTHON】pyautogui如何增加每秒的點選次數?
https://www.796t.com/post/ZTVueDA=.html
[4] pyautogui 文檔(五):截圖及定位功能
https://www.itread01.com/content/1556528332.html
[5] GitHub: keyboard
https://github.com/boppreh/keyboard
[6]《紅蓮華》自動化程式測試結果畫面
https://www.instagram.com/p/CaFd39EJlIL/
[7] 範例程式來源: 個人 GitHub 網路爬蟲專案
https://github.com/telunyang/python_web_scraping